

In the interest of full disclosure, I have to give major credit to Bill Buchholz for most of the design ideas described below. I took a good look at his Whizz trailer in advance of building my trailer for Yellow Bird, a pocket Northeaster, and shamelessly stole every idea I could.
I began the process by combing Craig’s List for a suitable trailer to modify. The trailers I located were all quite expensive and not quite what I needed. I therefore bought a 5’ x 8’ trailer kit (Model 37552) from Northern Tool and Equipment Co., now on sale for $499. The kit includes 12″ tires, wheels, axle, springs, hitch, tubes and channels for the frame, and lights. The kit comes unassembled and does not include a tongue jack.

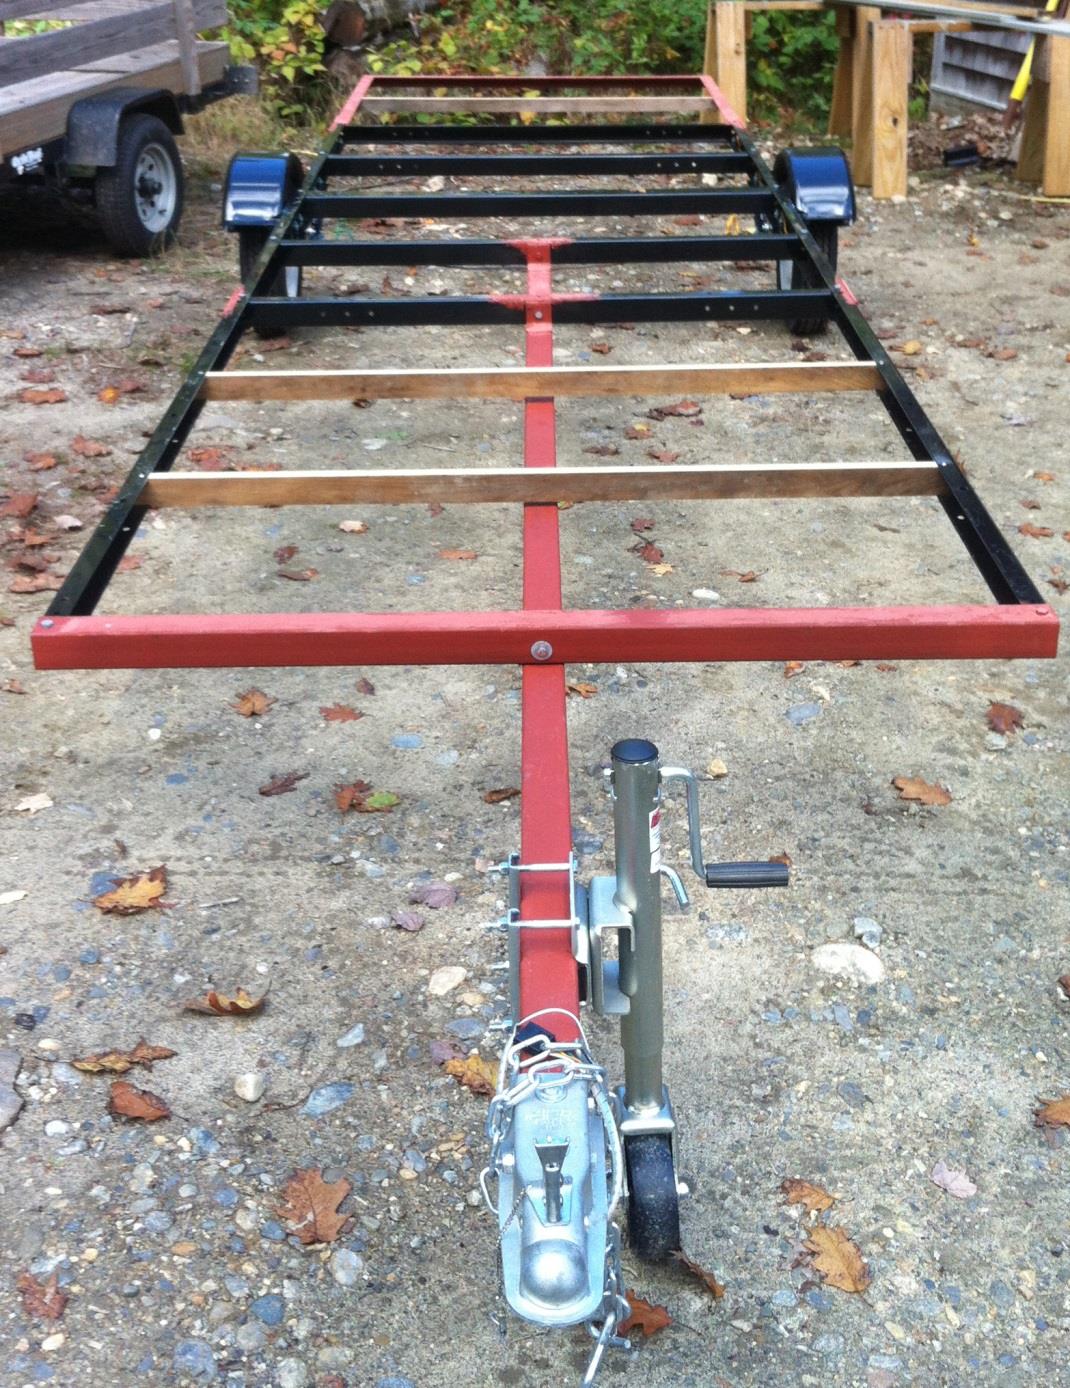
The image above shows the trailer with its metal parts set up. The red primed pieces are parts added to the metal supplied with the kit. The tongue and forward cross piece are 2” x 2” square tube. There are tabs welded to the tongue and to the three cross pieces connected to it.
I found that the tabs themselves were not keeping the trailer from wracking when only bolted, so I welded them. There are plates bolted on the outside of the forward black channels that are also bolted to the channels which form the center section of the trailer. The center section is the stock section provided by Northern Tool. The two black forward channels came with the kit but were designed to be supports for the stock tongue. I used almost all the Northern Tool trailer parts but not all in their designed locations.
The aft extension is a bit hard to see in the photo but is all 2” x 2” x 1/8” angle iron. It is bolted to the main section with plates in the same manner as the forward section. In retrospect this may be a bit under built. The trailer now has a slight sag back aft. I am not sure what would be the best way around this. Perhaps welding that section rather than bolting it.
I added 5/4” pressure treated cross pieces in between the metal parts to support the decking. I notched them to fit inside the channel and bolted them.
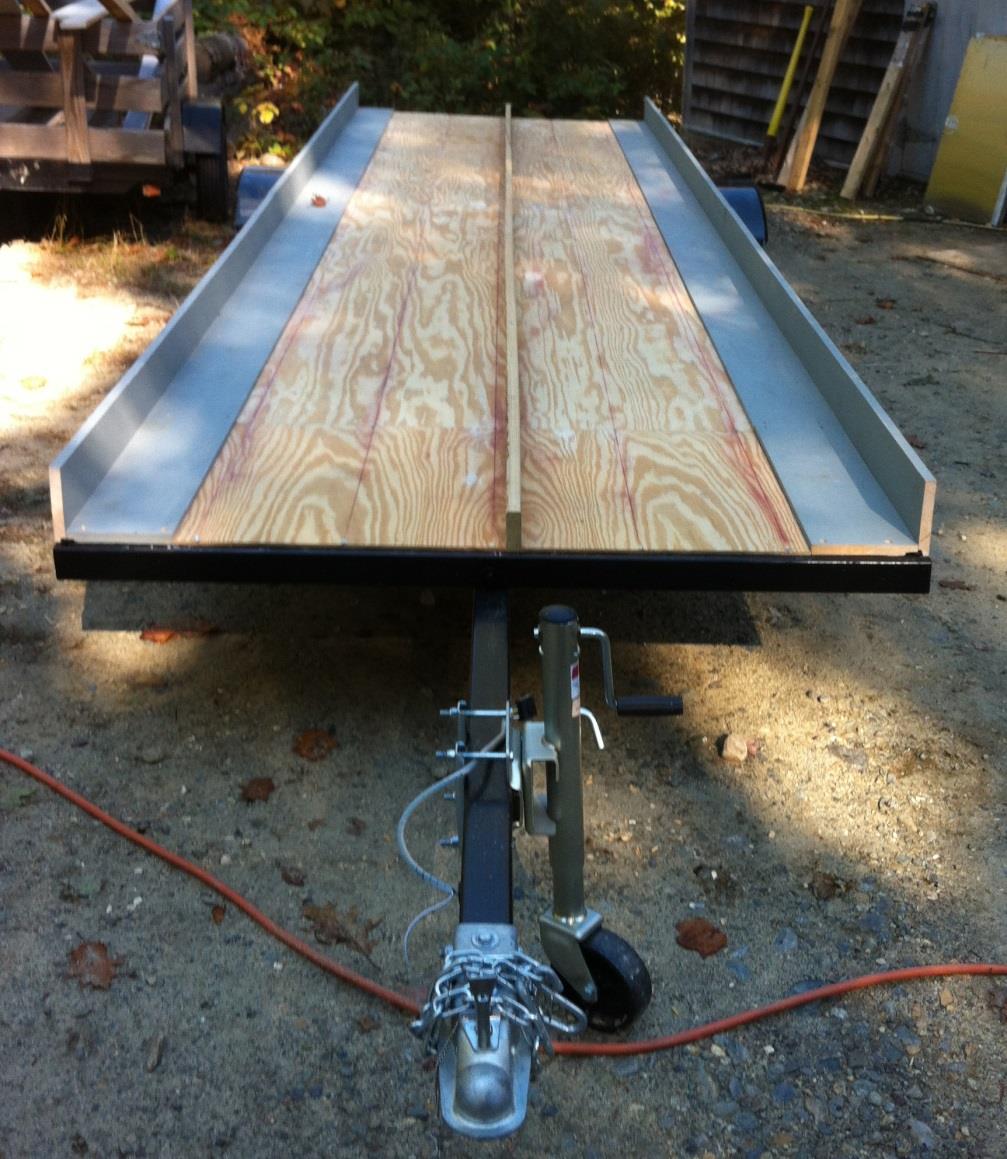
I used special machine screws with drill points to bolt down the 3/4” x 7 1/2” pine boards on the flat. To those pine boards, I sheet rock screwed the ¾” x 5 ½” pine side pieces. I had to notch out the boards in places for the bolt heads on the frames. I filled the space between the pine boards with ¼” x 4′ yellow pine plywood. I painted the underside of the plywood to protect it from road dirt and water.
The center upright piece of wood in the above photo is 5/4 pressure treated wood that just fit the forward chock of Yellow Bird, and runs the length of the trailer. The base of the trailer is 18’ long and the tongue is an additional 4’. The trailer at this stage was still not too ridgid; I could twist it a bit when I lifted one corner.
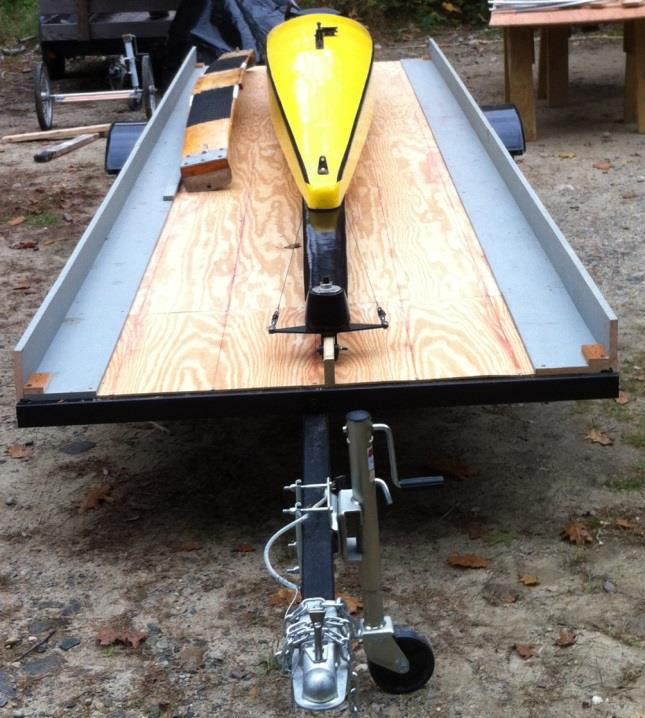
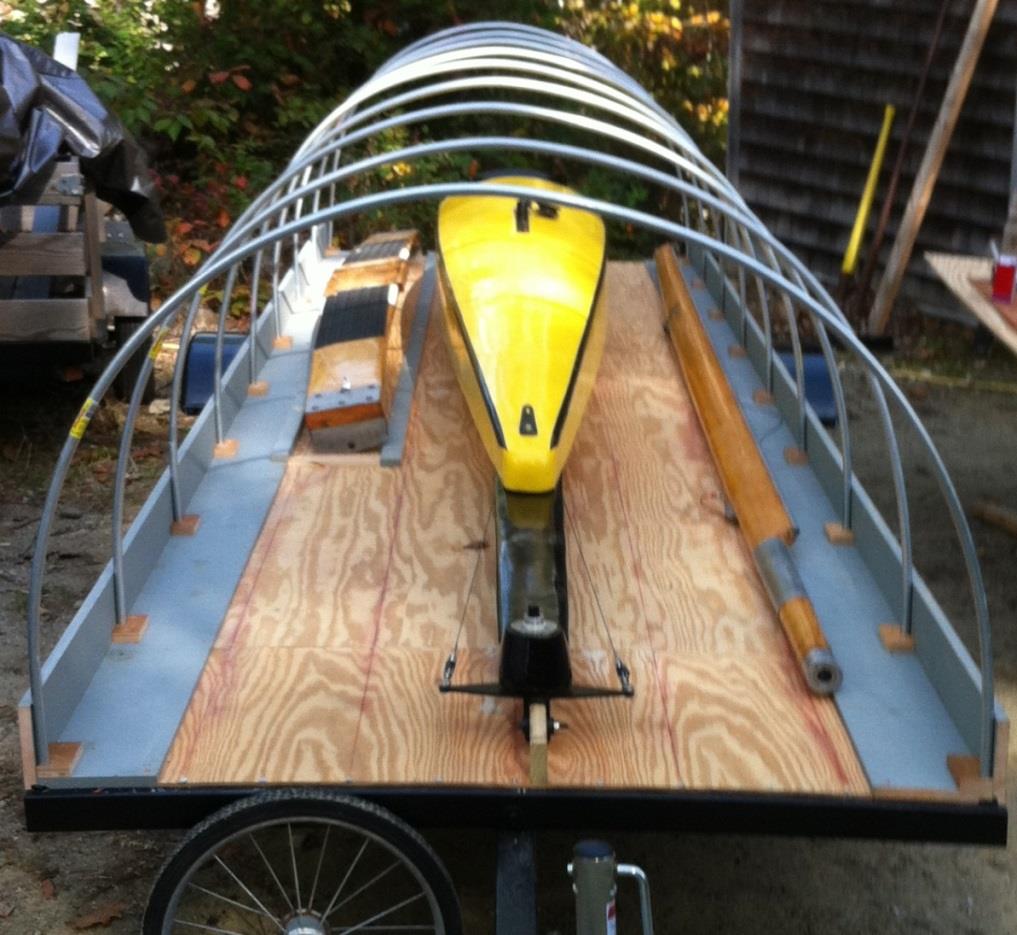
The photo above shows several things. First the through bolt with polyurethane washers that the forward chock comes to rest against. Second, the small plywood blocks in the corners that will eventually hold the ends of the bent bows. Third is the placement of the plank, though the plank holders are not installed.
I installed the fenders which I had to take off later to put the cover over the bows. I suggest leaving the fenders off until the very end.
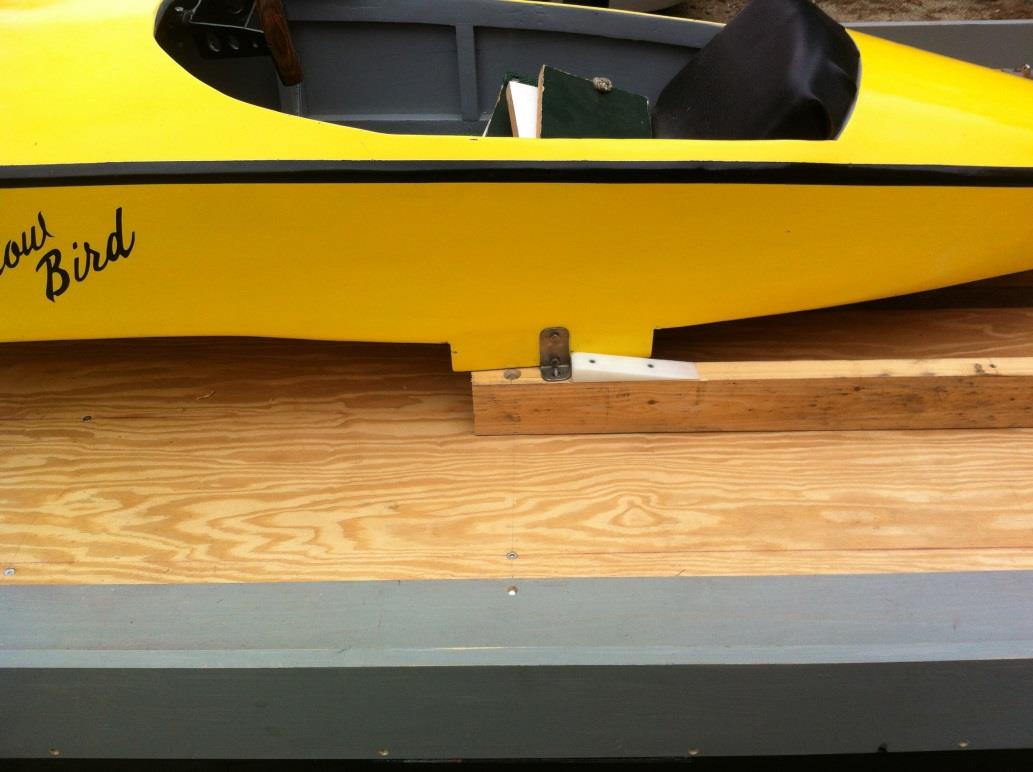
The image above shows the upright 2×4 used to hold Yellow Bird up off the steering cables. Note the UHMW wedge that keeps YB from sliding aft. There are also two ¼” studs that can hold the boat down while under way if needed.
The image above shows the trailer with all the bows in position. I ended up cutting them down after this to keep the profile of the trailer as low as possible. Also I wanted to make sure that if my covering scheme did not work, the bows would be short enough to enable the trailer to be covered with 1/8” plywood. I fastened the bows from the outside through the upright pine board with #10 self-drilling metal screws. I found I had to pre drill holes for all metal screws throughout the trailer. I used the normal #25 drill bit for #10-24 screws even though they were #10-32 screws.

Trailer with too-tall bows is shown above. The bending jig is partly shown on the right. The bows are bent from thin-wall metal conduit which is just shy of ¾” in diameter. I made a jig out of ¾” plywood to the right curve and bent the bows around that curve. I put a block at the base of the jig to butt the tubing against and another block on the outside of the curve to hold the tubing in place. I also put several blocks above the jig to keep the tubing from sliding off the jig. The bows spring back a bit when taken out of the jib, but they are easily pulled into the sockets later.
Notice in the photo above and below that the end bows, the pine boards and the ¼” plywood are all back 1” from the end of the trailer.
Once the bows were in place, I cut and notched three longitudinal stringers made from 1” x 1 ½” stock. I fastened them in place from the inside with self-drilling #10 flat head screws that penetrated only one side of the bows. Once the stringers were in place, the trailer stiffened up considerably.
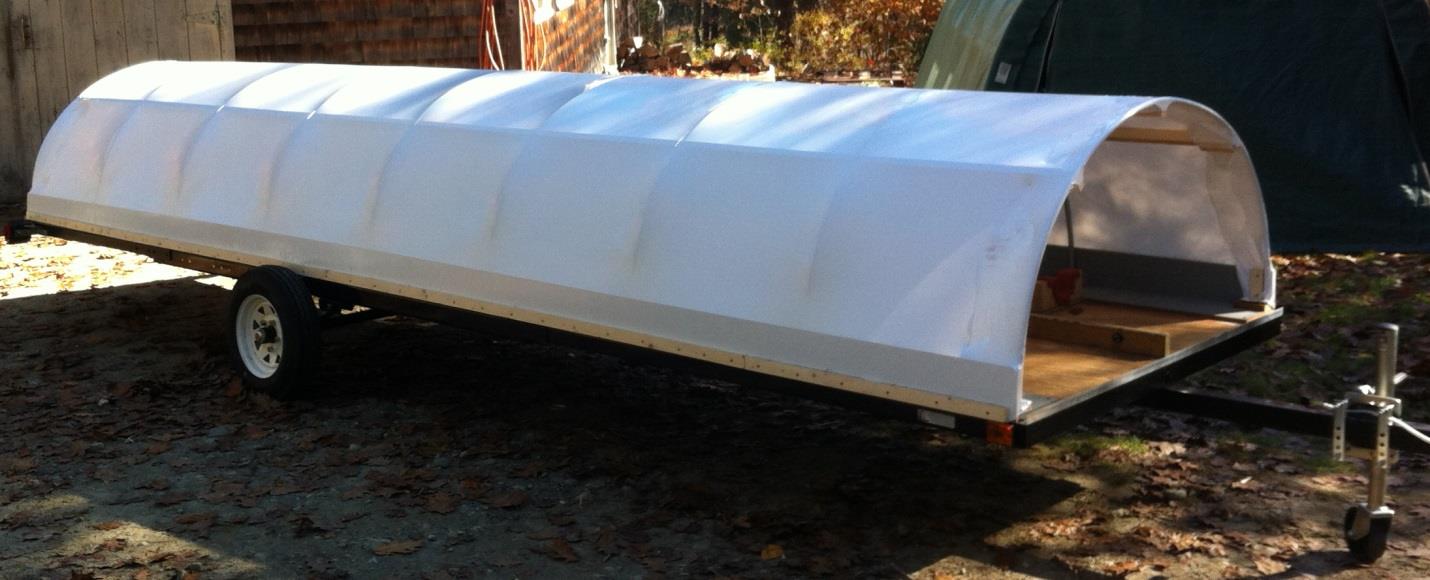
The trailer is shown here with the shortened bows just after shrink wrapping. I stuck the shrink wrap to itself on the ends. To hold the shrink wrap in place before shrinking, I screwed a 1” x 1 ½” stringer to the L-shaped pine board assembly along the full length on the outside. I also fastened small blocks to each of the stringers on the inside to hold the shrink wrap around the end bows.
There is a 1” x 1” aluminum angle fastened to the trailer frame on each end. This is installed to hold the bottom of the 1” thick door and why I held the deck and sides back an inch.
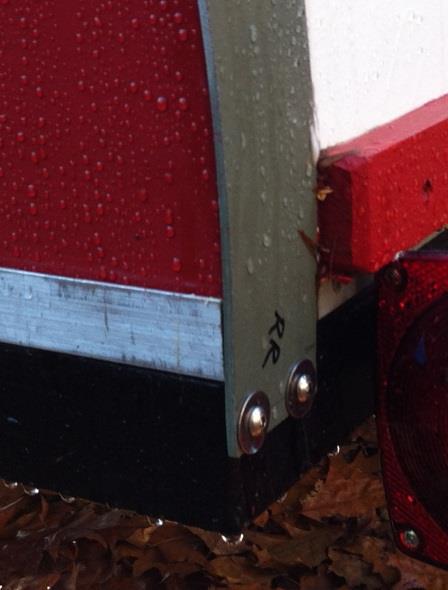
After the shrink wrapping process was complete, I bolted a strip of G10 (fiberglass) 2” wide by 1/8” thick to the trailer frame on one side and bent one over each of end bows. This could be aluminum, too. Then I bolted the far side to the trailer frame. To hold the G10 in place along each end bow, I glued each of them to the bow. I used panel adhesive on the inside and white silicone caulk on the outside. The G10 sticks out from each bow 1” and flush with both the end of the trailer frame and the aluminum angle which creates a recess for each door. The doors therefore, are bordered on the top edges by the G10 and held in on the bottom by the aluminum angle. It might be better to give the G10 a quarter inch overhang to help keep the water out.
I used ¼” yellow pine plywood for the the doors. I fit the plywood to each end. (The doors are not quite the same.) I glued a 3” wide ½” thick band of pine around the perimeter of the inside of each door. The pine stiffens and flattens the plywood. I painted each door a different color so I wouldn’t mix them up.

Once the doors were glued up, fit, and painted, I removed the temporary block from the central stringer and fastened a 1” x ¼” x 8” aluminum bar in its place. The bar was fastened in place with two sheet rock screws and installed so that it sticks out about 1 ½” past the door. I cut a mortise in the door to fit the bar. I made an aluminum piece with an opening the size of the section of the bar and bolted it to the outside of the door over the bar. I installed each door and marked the outside edge of the aluminum escutcheon on the bar. I then drilled a hole in the bar to fit a snap hook or lock such that the snap hook or the lock would hold the door in place.

To hold the plank in place, I screwed a 2” wide strip of pine down the right side of the trailer 10” inboard of the edge of the pine plank. I doubled up the inboard edge of the 7 ½” pine plank to form a 10” wide channel. I made an upright that holds the chock near the back of the trailer. The upright is fastened to one of the cross members of the trailer. The upright is designed to hold the chock from side to side. I made another upright and fastened it to a piece of UHMW constructed to slide between the outer right hand pine board and the longitudinal 10” inboard. The UHMW slides along the wooden channel and is kept from jamming by the chock on the plank. The idea is to place the chock on the sliding upright, slide the plank into the trailer and drop the other chock on the fixed upright located at the aft end of the trailer. This holds the plank in place with no fastenings. It also allows the plank to be loaded into the trailer without having to get inside the trailer.
The mast is held by three fitted notched uprights, two up forward and one aft. The two forward uprights are fitted with silicone foam rubber which is sticky. The round end of the mast fits into them and is held in place. Back aft the mast is held by the third notched upright. It remains to be seen whether the mast will slip forward. On the first 60 mile trip, it stayed in place.
I modified a set of wheels that came with YB so I could bolt them to the brackets on the side of YB that normally mount the plank. To load YB into the trailer, I wheel the boat around holding onto the spring board. I slip the forward chock over the central wooden upright and slide the boat forward until the hull comes close to hitting the edge of the trailer. I take the wheels off YB and lift the boat up so that the plank brackets slide along the side uprights. I slide the brackets over the UHMW wedges and down over the ¼” studs. For short trips this is all that is needed to hold Yellow Bird’s hull in place. I can put nuts on the studs if needed.
The trailer kit came with a certificate from China. I took that certificate and my credit card billing statement for the trailer to the town clerk and licensed the trailer for two years with little cost and minor hassles.
The trailer is light enough that I can move it around the yard with YB on board quite easily. The tongue weight is light enough that I can pick it up without too much effort. It trailers well at 60MPH with no swaying (so far so good). I am a bit worried about puncturing the shrink wrap. I have some special repair tape I will take along just in case.
I had a good many of the materials I used in stock. The design was somewhat driven by those materials. I have many more coverings of shrink wrap, though a recovering job would not be simple. My estimation of the cost of the trailer is around $700.


great job lots of useful information. it will help a lot of people build a great trailer.
thanks Bob S.